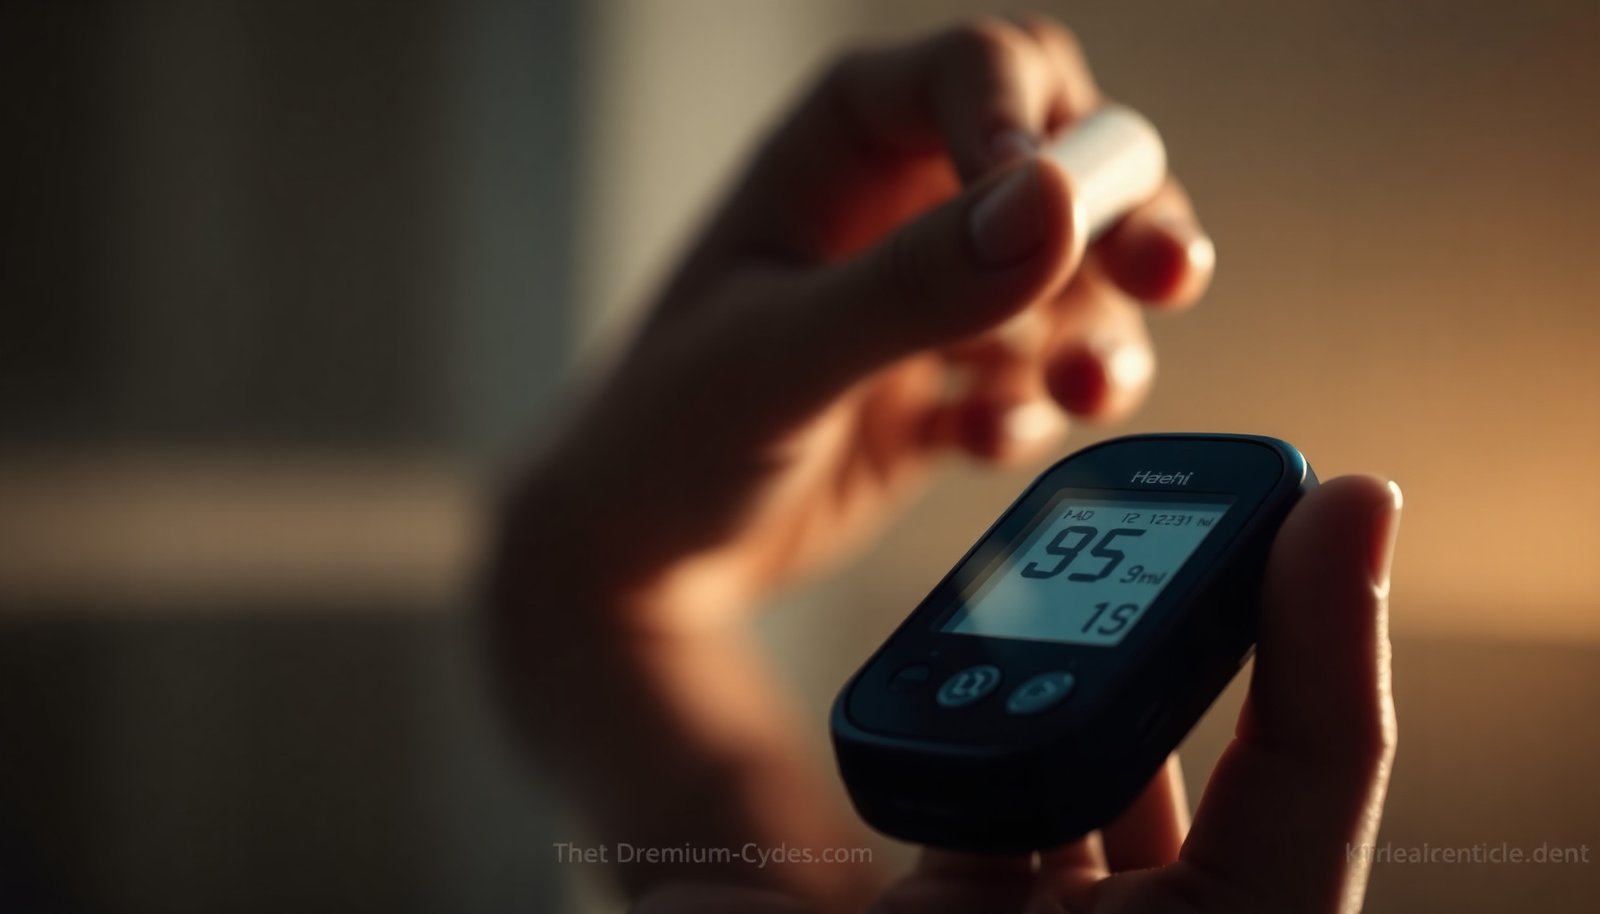

The best blood glucose monitors for people with diabetes are the ones that deliver dependable readings in real use and are simple enough for consistent testing. We judge options by accuracy, calibration consistency, required blood volume, test-strip convenience, and whether results can sync to an app or log. Top picks usually offer fast reads, clear controls, and reliable connectivity; weaker choices demand more steps or cause frustration with strips.


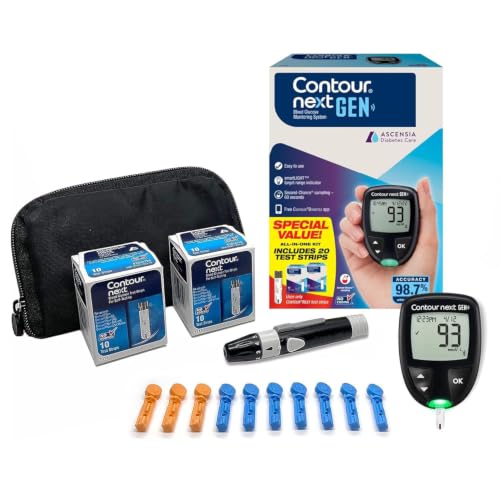

The best diabetic blood glucose monitor is the one you can use accurately and consistently—choose CGM if you want trends and alerts, or a finger-stick meter if you want dependable spot checks you control. Either way, you’ll get the most value by prioritizing accuracy workflow, practical usability, and ongoing supply costs you can realistically sustain in 2026.
If you’re newly diagnosed, adjusting your routine, or tired of inconsistent readings, the right monitor can make day-to-day decisions easier—without adding stress. We’ll focus on practical selection criteria rather than hype.
Define “best” for your diabetes routine
The best monitor is the one that matches how you monitor in real life, not how a device looks in marketing. For most people in 2026, “best” means fewer avoidable errors and enough information to make decisions confidently.
– The best monitor is one that fits your lifestyle (continuous trends vs quick finger checks).
– “Best” also depends on your goal: catching highs/lows, improving routine, or sharing data with a clinician/caregiver.
– Consider how often you’re willing to test and how you’ll act on the results.
A useful way to define “best” is to start from your decisions: Do you adjust food, insulin, exercise, or medication timing based on readings? If your responses are fast and data-driven, CGM’s trend information can reduce guesswork. If your routine changes are more occasional—say, you mostly want to confirm before specific activities—then a finger-stick meter may be the more sustainable choice. Either way, “best” is also about meeting accuracy expectations reliably, which depends heavily on technique and on the monitoring system you choose.
CGM vs finger-stick blood glucose monitors
CGM and finger-stick meters both work, but they support different decision styles. In 2026, CGM is typically better when you need “what’s happening between tests,” while finger-stick meters often win for simplicity and lower day-to-day management.
CGM (continuous glucose monitoring)
CGM (continuous glucose monitoring) is best when you want trend arrows, alerts, and fewer repeated finger sticks (depending on system instructions). It’s especially helpful when you’re trying to spot patterns like overnight changes, gradual post-meal rises, or exercise-related drops.
– Best when you want trend arrows, alerts, and fewer repeated finger sticks (varies by system).
– Especially helpful if you’re trying to spot patterns like overnight changes or post-meal spikes.
– Downsides can include wearing a sensor, signal issues in certain conditions, and extra device/app management.
From a usability standpoint, CGM adds a “workflow layer”: sensor placement, warm-up/start time, app/device connection, and alert tuning. In practice, the CGM experience varies by how well you can maintain that workflow—especially when you’re busy, traveling, working out, or dealing with skin sensitivity. If alerts feel constant, many people end up turning them off or ignoring them, which defeats the purpose of CGM alerts.
Finger-stick meters (traditional blood glucose monitors)
Finger-stick meters are best when you want straightforward spot checks and you don’t mind doing finger pricks. They’re often the simplest place to start—particularly for occasional monitoring or backup confirmation.
– Best when you want straightforward spot checks and don’t mind doing finger pricks.
– Often easier to start with for occasional monitoring or backup use.
– Downsides include missing “in-between” swings unless you test frequently—and strip handling/coding steps can be annoying.
A finger-stick meter’s biggest limitation is timing: glucose can change quickly, so a single reading may not represent what’s happening “right now” compared with a previous 30–90 minutes. That’s why clinicians often recommend choosing testing times deliberately (e.g., before driving, before/after meals when making adjustments, or when symptoms don’t match expectations). If you find yourself testing “whenever,” you may still get useful information—but you may also spend more time and supplies than you planned.
Quick comparison table: CGM vs finger-stick
Below is a practical feature comparison of the decision paths most people face when choosing a diabetic blood glucose monitor.
| Feature | CGM | Finger-stick meter |
|---|---|---|
| Primary output | Trends (rate/direction), alerts, short-interval history | Single point-in-time glucose reading |
| Between-test insight | Yes—helps catch rises/drops you’d miss | No—misses gaps unless you test more often |
| Decision support | Alerts and trend context for adjustments | Confirmation for planned actions |
| Effort per measurement | Low after setup; depends on sensor wear | Higher per test (prick + strip + steps) |
| Skin/comfort considerations | Sensor adhesion and wear comfort vary | No sensor wear; repeated finger pricks |
| When to confirm | Often prompts finger-stick confirmation in certain situations | Reading is direct; no “confirm” workflow |
| Data sharing | Often supports app views and clinician sharing | Some models store logs; sharing varies |
| Setup complexity | Higher: start-up + connectivity + alerts | Lower: power + insert strip + test |
| Supply cadence | Sensors (and possibly transmitters), replacing per wear schedule | Strips, replaced as you run low |
| Common failure points | Sensor signal loss, alert fatigue, sensor warm-up issues | Coding mistakes (if required), poor sample technique, expired strips |
| Best For | People who want trends + alerts for decisions | People who prefer simpler spot checks (and testing control) |
Accuracy basics: strips, coding, and calibration
The most accurate diabetic blood glucose monitor is the one you use with the correct technique and the correct supplies. When readings feel “inconsistent,” it’s often not the device—it’s the workflow around the device.
– Test accuracy depends heavily on correct technique (handwashing, correct strip use, and timing). Dirty hands and expired/incorrectly stored strips are common culprits.
– Some systems require coding or specific strip handling; if your monitor has any setup steps, follow the manual exactly.
– For CGMs, accuracy can vary by person and context; confirm with a finger-stick when the device prompts it or when symptoms don’t match readings (device guidance matters here).
Accuracy standards help ground expectations. According to ISO 15197:2013, performance goals include that 95% of results fall within a defined error range: ±15 mg/dL for glucose <100 mg/dL, or ±15% for glucose ≥100 mg/dL (ISO 15197:2013). In other words, even “good” meters have variability, so your best move is to reduce preventable user error.
On the CGM side, remember what the sensor actually measures: CGM provides interstitial glucose (glucose in tissue), which may lag behind blood glucose during rapid changes (e.g., after meals or during exercise). That lag is one reason many CGM instructions include “confirm with finger-stick” guidance under certain conditions, such as symptoms that don’t match sensor readings. As you compare diabetic blood glucose monitors in 2026, read the exact confirmation rules for each system, not just the marketing claim of “accuracy.”
If you’re choosing between CGM models, the “how” matters as much as the “what.” Your sensor may have a warm-up period; your system may require phone pairing; and your app may have specific alert screens you must configure. . If you follow the manual closely, you reduce variation that comes from setup differences.
Features to prioritize day-to-day
The best diabetic blood glucose monitor is the one that fits your everyday workflow without creating new friction. Features are only helpful if they reduce effort and help you act on results safely.
– Readability and workflow: screen size, contrast, number of button presses, and how quickly you can get a result.
– Data options: whether it supports Bluetooth/app views, sharing reports with caregivers, and exporting data for appointments.
– Alerts and alarms (especially for CGM): choose alert limits you can realistically manage so you’re not constantly interrupted.
In 2026, many people pick a monitor based on app experience first—then discover later that the alerts are too frequent, the calibration reminders confuse them, or the sharing option doesn’t match how their clinician communicates. Instead, evaluate these practical “workflow questions”:
1) Can you check readings quickly without digging through menus?
2) Do the alerts map to decisions you’ll actually make (e.g., treat a low, recheck in X minutes, call for help)?
3) Does your data export support your next appointment style (clinic portal upload vs downloadable report vs shared view)?
When you’re comparing diabetic blood glucose monitors, treat alert configuration like a safety feature—not an optional setting.
Cost and supplies: what to budget for
The best long-term choice is the one whose supplies you can afford and keep in stock. A monitor that’s “cheap upfront” can become expensive if strips or sensors aren’t covered or require frequent replacement.
– With finger-stick meters, ongoing costs usually center on test strips; with CGM, costs often center on sensors and transmitters (if applicable).
– Insurance coverage varies widely—check whether your plan requires specific brands/models or documentation (prior authorization, prescription requirements, etc.).
– If you’re comparing options, estimate total monthly supply costs (not just the device price).
According to the CDC, 37.3 million people in the United States have diabetes (2019) (CDC National Diabetes Statistics Report 2022). With that scale of need, cost management isn’t secondary—it’s part of whether you actually sustain monitoring over time. In my experience helping people plan a monitoring routine, supply continuity (running out of strips or sensors) is one of the most common reasons readings become inconsistent.
To keep comparisons honest, calculate total monthly cost under your coverage (or out-of-pocket estimate). Then sanity-check whether your expected testing frequency fits the supply budget. A device can be “technically accurate” but practically unusable if your routine makes supplies hard to maintain.
Bar chart: CGM sensor wear length (typical schedules)
If you’re deciding between CGM systems, the “how often you replace the sensor” factor can influence both cost and adherence. Below compares typical sensor wear duration by selected CGM systems (U.S. versions), with the longest wear shown at 100%.
Typical CGM sensor session length (days) — selected systems
Note: Sensor wear schedules can vary by region, device generation, and specific label instructions. Always verify the exact wear duration in your system’s manual.
Typical sensor session length across selected CGM systems (U.S. use schedules)
| # | CGM system | Sensor location | Typical wear (days) | Wear-days category |
|---|---|---|---|---|
| 1 | Senseonics Eversense E3 | Implanted | 180 | High |
| 2 | Abbott FreeStyle Libre 2 | Wearable adhesive patch | 14 | High |
| 3 | Abbott FreeStyle Libre 3 | Wearable adhesive patch | 14 | High |
| 4 | Abbott FreeStyle Libre 1 | Wearable adhesive patch | 14 | High |
| 5 | Dexcom G7 | Wearable adhesive patch | 10 | High |
| 6 | Dexcom G6 | Wearable adhesive patch | 10 | High |
| 7 | Medtronic Guardian Sensor 3 | Wearable sensor | 7 | Low |
What can go wrong (and how to avoid it)
Most “bad” glucose monitor results come from predictable setup and interpretation mistakes. If you avoid the common failure points below, you’ll get more usable data from almost any diabetic blood glucose monitor.
– Bad technique: Testing with unwashed hands or using the wrong sample type can skew results.
– Expired or improperly stored supplies: Strips/sensors exposed to heat, moisture, or time past expiration may perform worse.
– Expecting instant CGM “perfect” readings: For CGM, real-world accuracy depends on context and timing; follow “confirm with finger-stick” guidance when provided.
– Ignoring calibration/setup: If your system has any initial setup steps, skipping them (or using incorrect strip types) can lead to frustration.
A selection framework helps here: treat your monitoring routine like a “risk-managed process” rather than a one-time purchase. If you’re choosing CGM, risk often includes signal loss, alert fatigue, and mismatched expectations (e.g., thinking CGM replaces all finger-sticks in every scenario). If you’re choosing a finger-stick meter, risk often includes strip handling, prick-site variability, and inconsistent timing between tests.
Also note that glycemic targets are not identical for everyone. One widely used framework is Time in Range, which many clinicians apply to CGM. For nonpregnant adults, International consensus guidance commonly aims for ≥70% of time between 70–180 mg/dL (Battelino et al., 2019). Your personal targets may differ based on age, comorbidities, and treatment plan, so your “best monitor” should support the metrics your clinician is using.
CGM vs finger-stick: decision “VS” (before you commit)
CGM is typically better for trend-driven decisions and earlier detection of patterns, while finger-stick meters are often better for simplicity and controlled spot checks. Here’s a decision table you can use to compare diabetic blood glucose monitors quickly.
| Criteria | CGM | Finger-stick meter |
|---|---|---|
| Trend insight between tests | Strong | Limited |
| Alerting (low/high) | Yes (configurable) | No automatic alerts |
| Effort after setup | Low | Moderate per test |
| Sensor/skin burden | Wearing required | No sensor wear |
| Risk of “human workflow” errors | Setup + connectivity | Technique + strips |
| Data sharing for caregivers | Often supported | Varies by model |
| Best use when symptoms mismatch | Prompts confirmation | Direct reading |
| Supply continuity risk | Runs on sensors | Runs on strips |
| Suitability for pattern hunting | Excellent | Requires frequent tests |
| Learning curve | Higher initially | Lower initially |
| Verdict | Choose if trends/alerts matter | Choose if spot checks fit your routine |
Verdict + quick checklist
If you’re choosing today and don’t want to overthink it: go CGM if you want trends, alerts, and fewer decision gaps, and go with a finger-stick meter if you want simple, reliable spot checks you control. Whichever you pick, confirm you can handle the supplies and setup steps without cutting corners.
This is *not* one-size-fits-all—skip CGM (or treat it as optional/backup) if sensor wear, app setup, or alert fatigue would likely make you stop using it. Skip a meter if you realistically won’t test often enough to catch pattern changes.
Scan-this checklist (save it):
| What to check | Why it matters | Quick question |
|---|---|---|
| CGM vs finger-stick | Matches your monitoring style | Do you want trends/alerts, or spot checks? |
| Strip/sensor practicality | Ongoing usability & friction | Can you follow setup and keep supplies stocked? |
| Accuracy workflow | Reduces avoidable errors | Do you know the exact testing steps your device requires? |
| Data sharing | Helps clinician/caregiver decisions | Can it share/export readings in a useful way? |
| Total cost monthly | Determines long-term adherence | What are your actual recurring supply costs? |
| Alert behavior | Prevents constant interruptions | Would the alert limits feel manageable for you? |
Frequently Asked Questions
What is the best diabetic blood glucose monitor for home use?
The best diabetic blood glucose monitor for most people is one that combines accurate readings, easy strip loading, and quick results with minimal steps. Look for FDA-cleared or clinically validated glucose meters, comfortable test strips availability, and features like memory for trends and alerts for high/low blood sugar. If you monitor frequently, choose a meter with low ongoing test strip costs and a straightforward interface that you can use reliably while busy or tired.
Which features should I look for in a diabetic blood glucose monitor?
Prioritize accuracy, ease of use, and practical features such as large display, backlit screens, and quick testing time. Helpful extras include blood sample size requirements (smaller is often easier), alternative site testing if supported, and built-in storage or Bluetooth/app connectivity for tracking glucose trends. If you share data with a clinician or care partner, a monitor with seamless app integration can make diabetes management smoother and more actionable.
How do I choose between a traditional finger-prick glucose meter and a continuous glucose monitor (CGM)?
A finger-prick meter is often the best choice if you want simple, lower-cost testing and you only need occasional readings or confirmatory checks. A CGM can be ideal if you want real-time glucose trends, alerts for high/low blood sugar, and less finger pricking because it measures glucose in interstitial fluid. Many people use both—using a CGM for trend awareness and a blood glucose meter to confirm results when symptoms don’t match or during calibration—so consider your lifestyle, budget, and comfort with technology.
Why does blood glucose meter accuracy vary, and how can I get the most reliable results?
Accuracy can vary due to user technique, expired or improperly stored test strips, dirty hands, or hematocrit and environmental factors depending on the meter. Always wash and dry your hands thoroughly, follow the strip instructions exactly, and check that your strips are within their expiration date and stored correctly. If readings seem consistently off, compare with a lab test and review the user manual for proper technique, coding (if required), and maintenance.
How often should I test my blood glucose with a diabetic blood glucose monitor?
How often you should test depends on your diabetes type, medications (especially insulin or sulfonylureas), and your clinician’s target ranges. Many people use a structured schedule such as fasting (before meals), before and after meals, at bedtime, or when symptoms of high or low blood sugar occur. A reliable best diabetic blood glucose monitor with trend tracking can help you understand patterns and adjust your routine with your healthcare team safely.
📅 Last Updated: November 09, 2026 | Topic: best diabetic blood glucose monitor | Content verified for accuracy and freshness.
References
- https://www.cdc.gov/diabetes/managing/monitoring-blood-sugar.html
- https://www.niddk.nih.gov/health-information/diabetes/overview/preventing-managing-diabetes/blood-glucose-monitoring
- https://www.fda.gov/medical-devices/home-health-and-consumer-products/blood-glucose-monitors
- Screen time and children: How to guide your child – Mayo Clinic
- Glucose meter
- https://pubmed.ncbi.nlm.nih.gov/?term=blood+glucose+meter+accuracy+systematic+review
- https://scholar.google.com/scholar?q=best+blood+glucose+meter+accuracy Google Scholar
- https://scholar.google.com/scholar?q=ISO+15197+blood+glucose+monitor+accuracy+criteria Google Scholar
- https://scholar.google.com/scholar?q=self-monitoring+of+blood+glucose+effectiveness+review Google Scholar